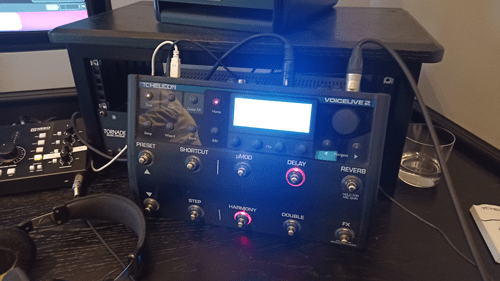
Last week I visited a client, R, for a 5-hour studio support session in his central London studio. One of the tasks we covered was:
Setting up a TC Helicon Voicelive 2 in Cubase

R wanted to be able to sing his vocals into his Voicelive 2 and have the harmonies created by the Voicelive match the chords of his song in Cubase.
The first thing we did was to make sure the Voicelive 2 was set up correctly. We checked the gain settings for the inputs and followed the signal path through the unit to make sure we were getting the sound R wanted. We read through the manual of the unit and worked out how we could turn the dry signal on and off depending on the type of vocals R wanted to record.
In order to get audio out of the Voicelive I showed R how we could set up the Voicelive and the Apollo X audio interface to work as an Aggregate audio device.
In Cubase we opened the Device Settings menu and selected the Aggregate audio device as the master ASIO driver. We reconfigured Cubase’s Audio Connections window so that the Voicelive would show on the audio track’s inputs menu.
Then we could create an audio track in Cubase, select the Voicelive as the input device, arm and monitor the track for recording and we should hear the signal from the Voicelive.
Unfortunately, this setup didn’t work. Possibly due to driver conflicts or OSX not being happy creating an aggregate device that uses both USB and Thunderbolt at the same time. Rather than spend time in our session troubleshooting this problem, we decided to simplify the setup and record the Line output of the Voicelive via one of the Apollo X’s Line inputs. The only trade-off would be the theoretical tiny amount of added noise resulting from using analogue rather than digital connections. But nothing to worry about. If the option of using a digital connection wasn’t available, it wouldn’t have been something we would have worried about.
Now we had a setup where R could sing into the microphone, hear his vocal being processed by the Voicelive and see it being recorded in Cubase.
I showed R how to create a MIDI track in Cubase and route the output of that track to the Voicelive’s MIDI input via USB. We set the input of that MIDI track to respond only to R’s master keyboard to avoid any conflicts with MIDI signals from other devices in R’s studio.
When both the audio and MIDI tracks were armed for record, R was able to sing and control the harmonies generated by the Voicelive.
We tested the new setup by recording into one of R’s songs and made a video to explain everything so that R would be confident recreating the setup on other tracks.
ABOUT THE AUTHOR

PAUL ANDREWS
I’m the owner and lead technician for Audio Support, a small company based in London, UK that connects remotely with clients worldwide to help them with their music technology issues. I’ve run Audio Support since 2005 and in that time I’ve seen and solved thousands of recording studio problems.
Outside of Audio Support, I run music workshops at a local school, play bass in a 90s tribute function band and perform modular synth jams with friends on Twitch.
Get support for similar problems
Get in Touch
- Use WhatsApp, email or the form below to contact us.
- We will confirm if we can help.
- We will arrange a date and time for a remote support session and send a link for you to make payment.
- At the agreed time, our technician will connect via voice call and remote desktop to resolve the issue.
Find out more about how our services work.